Ever stared at your reflection, tried to guess the distance between your eyes, and ended up feeling like you were guessing the weather?
That moment of uncertainty is what drives most people to hunt for a pupillary distance printable ruler – a simple sheet you can print, place on a flat surface, and measure your PD without leaving home.
In our experience at BuyEyeglass, we’ve seen customers struggle with blurry lenses simply because the PD they entered was off by a millimetre or two. It’s amazing how such a tiny number can make the difference between crystal‑clear vision and constant readjustment.
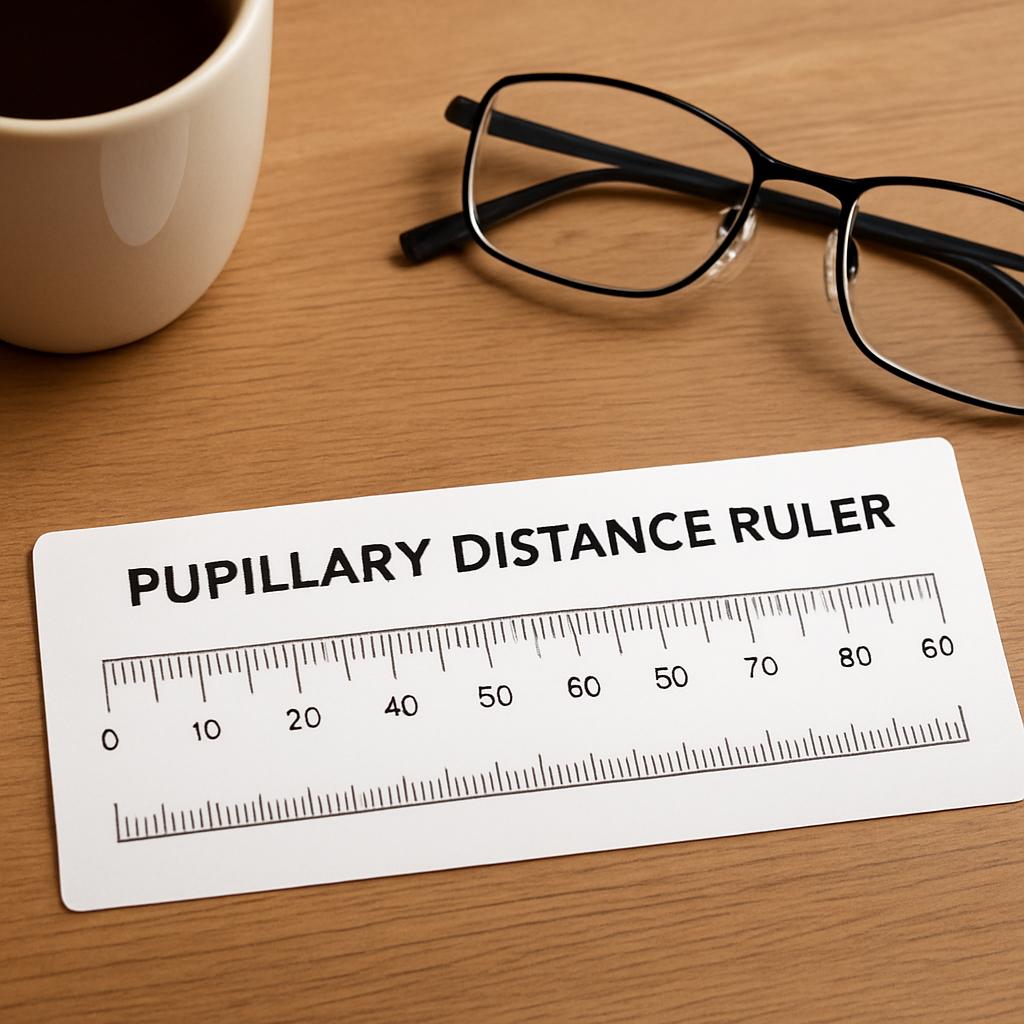
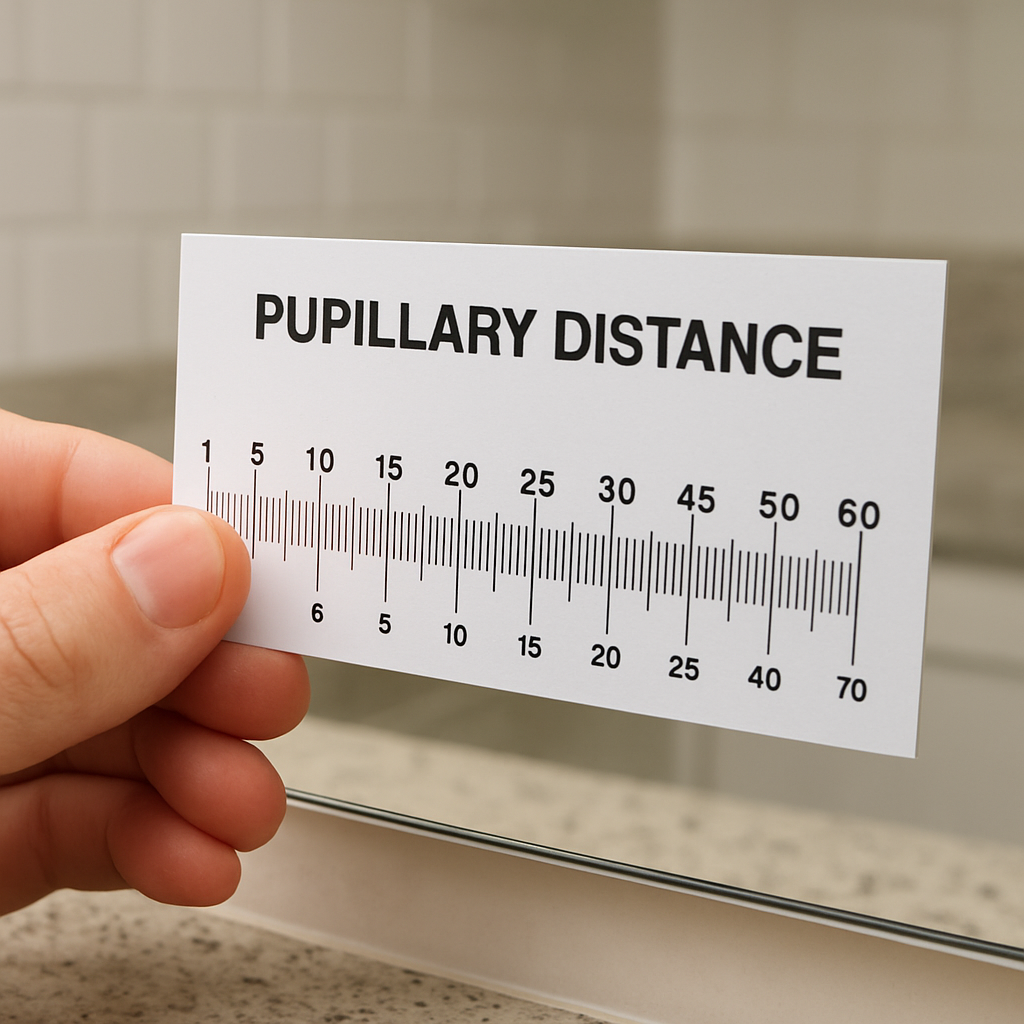
So, what exactly is a pupillary distance printable ruler? Think of it as a calibrated ruler that already includes the scale you need. You print it on standard letter‑size paper, cut along the dotted line, and line it up with your pupils to read the measurement directly.
But why bother printing one yourself? Buying a fancy digital device can cost upwards of $30, and most smartphone apps ask for you to hold the phone at arm’s length, which can be tricky. A printable ruler costs nothing but a sheet of paper and a few minutes of your time.
Here’s a quick mental picture: you sit at a desk, place the ruler on the table, look straight ahead, and line the two marks with the centre of each eye. The distance between the marks, shown in millimetres, is your PD.
Does it sound too good to be true? Not at all. The key is using a ruler that’s been verified for accuracy – many optometry blogs share free PDFs that have been calibrated against professional tools.
If you’re wondering whether a printable ruler works for both single‑vision and progressive lenses, the answer is yes. The measurement itself doesn’t change; it’s just the lens design that adapts to your PD.
And if you ever feel unsure, you can always double‑check by measuring a second time or asking a friend to help. A little redundancy saves you from ordering glasses that need a costly return.
Ready to give it a try? Grab a fresh sheet of paper, print the PDF, and follow the simple steps we’ll cover in the next sections. You’ll be surprised how fast you can get a reliable PD without stepping into a clinic.
A pupillary distance printable ruler lets you measure your PD at home with just a sheet of paper, a printer, and a few seconds of careful alignment.
Follow our steps, double‑check the reading, and you’ll avoid costly lens returns while ordering glasses that fit perfectly right from the first try.
Alright, you’re ready to measure your PD, but first you need a ruler you can trust. The whole trick lives in that PDF you download, it’s already calibrated in millimetres, so all you have to do is print it straight.
If you don’t have a favorite source, a quick search lands you on sites that specialise in free printable PDFs. One that consistently pops up is JiffyPrintOnline, which hosts a simple, no‑frills PD ruler you can grab with a single click. Because the file is a true‑size PDF, the dimensions stay accurate as long as you don’t scale it during printing.
Now that you’ve got the file, let’s make sure the printer doesn’t mess with the scale. Open the print dialog and look for an option that says “actual size” or “100 %”. Turn off any “fit to page” or “shrink to fit” settings; those will stretch or squash the ruler and throw off every measurement.
Paper matters, too. A standard 20‑lb printer paper works fine, but if you have a bit of glossy cardstock on hand, use it. The extra weight keeps the ruler flat and reduces warping, especially if your printer tends to feed paper unevenly.
Before you hit print, do a quick sanity check: measure the length of a known object, say a credit card, against the ruler on your screen. The numbers should line up. If they don’t, double‑check that you didn’t accidentally select “scale to fit”. Once everything lines up, go ahead and print.
When the sheet comes out, let it dry for a few seconds, then use the dotted line in the corner to cut it out. A simple pair of scissors does the job; just try to keep the edges as straight as possible. If you want a cleaner edge, a craft knife and a ruler underneath can give you a razor‑sharp cut.
If you’d rather skip the home‑printer hassle, you can also send the PDF to a local print shop. IVOTAgent, for example, offers a quick online upload and will mail you a perfectly printed ruler on sturdy paper, handy if you’re short on time or don’t have a reliable printer.
A final tip: make sure the ruler is oriented correctly so that the measurement marks line up with your left and right eyes.
At this point you should have a clean, accurately scaled PD ruler in your hands. Give it a quick visual test by holding it up next to a ruler you know is correct; the two should line up exactly. If they do, you’re good to go for the next step: measuring your pupillary distance.
Before you stash the ruler away, it’s worth giving it one more sanity run. Place the printed sheet on a flat surface, align the two end marks with a known 10 mm grid on your phone’s ruler app, and confirm the spacing matches. If the numbers line up, you’ve got a reliable tool you can reuse for future orders or when you need to verify a new prescription. Keep the ruler in a protective sleeve or a zip‑lock bag to stop it from curling, and you’ll always have a ready‑made PD gauge at the ready.
Before you even think about lining up the marks on your printable ruler, the space around you needs a little TLC. A dimly lit kitchen table or a cluttered bathroom sink will do you no favors – you’ll end up guessing, and those guesses add up to blurry lenses later.
Natural daylight is the gold standard. If you can, set up near a window on a sunny morning. If that’s not possible, switch on a bright LED lamp that shines straight onto your face without creating harsh shadows. A quick test: hold a piece of white paper under the ruler; you should see the millimetre markings clearly, no flicker.
Why does this matter? According to Kings Highway Vision Center, even a half‑millimetre error can cause eye strain or headaches, especially with progressive lenses.
Grab a clean desk or a sturdy table. The surface should be level – any wobble will tilt the ruler and throw off your measurement. If you’re using a wooden table that’s a bit uneven, place a thin clipboard underneath the ruler for extra stability.
Real‑world example: one of our readers printed her ruler on glossy photo paper, laid it on a slightly warped coffee table, and ended up with a 2 mm discrepancy. After moving to a flat kitchen countertop, her second reading matched her optometrist’s number perfectly.
Put the ruler on plain white paper or a matte board. Shiny surfaces reflect light and can make the tiny millimetre lines hard to read. If you’re measuring in front of a mirror, make sure the mirror isn’t foggy – a quick wipe with a dry cloth does the trick.
Having these items within arm’s reach prevents you from pausing mid‑measurement to fetch something else – and those pauses are where mistakes sneak in.
Before you measure, line the printed ruler up with a known 15 cm (150 mm) ruler. If the marks line up, you’re good to go. If they’re off, re‑print with the printer set to 100 % “Actual size”. This extra step saves you a costly return later.
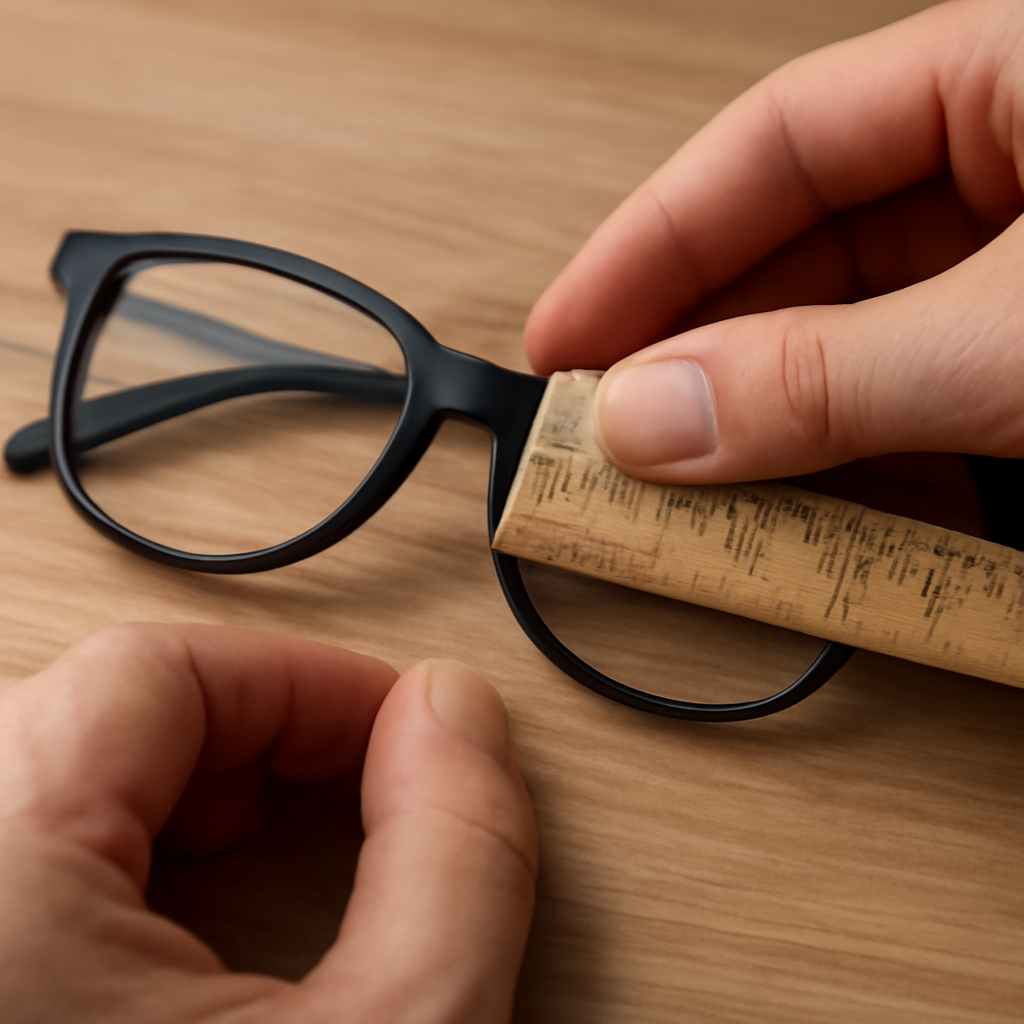
And don’t forget to test the ruler’s durability. If you plan to use it multiple times, consider a sturdier print. Dr Rahul Dubey often recommends a laminated version for patients who need a reliable home‑tool, and you can even get a professional‑grade print from services like JiffyPrintOnline if you want something that won’t tear after a few uses.
Once every item on that list is checked off, you’ll feel confident stepping into the next phase – actually reading your pupillary distance with the printable ruler. It’s amazing how much smoother the process feels when the environment is set up right.
Alright, the ruler is printed, cut, and validated. Now it’s show‑time.
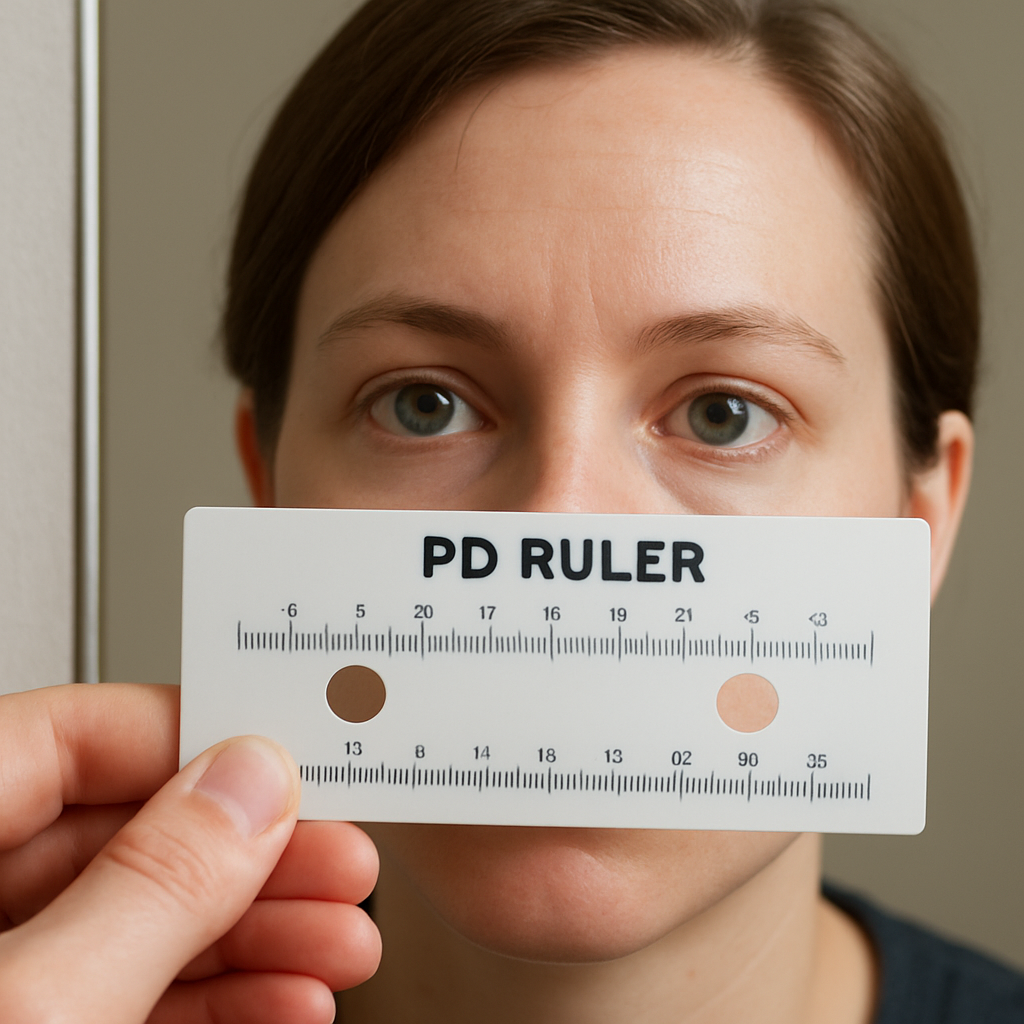
First, sit about 20 cm (8 inches) from a plain mirror. You want a clear view of both eyes without any glare – think of a bathroom mirror on a bright morning, not a foggy glass.
Place the printable ruler against the bridge of your nose, the little flat edge that sits right between the eyes. The two black vertical marks on the strip are the reference points – line each one up with the centre of the corresponding pupil.
Got it? Good. If you’re not sure where the pupil centre is, try this trick: stare straight ahead at a distant object (like a picture on the wall) and notice the dark circle that seems to hover in the middle of each eye. That’s your pupil.
1. Align the left mark. Move the ruler until the left vertical line sits exactly over the centre of your left pupil.
2. Align the right mark. Without moving the left side, slide the ruler until the right line meets the centre of your right pupil.
3. Read the distance. Look at the scale printed between the two marks – the number in millimetres is your PD.
Sounds simple, right? But a tiny slip can add or subtract a millimetre, and that’s enough to shift a lens off‑center.
Tip: Keep your head still. A quick head‑tilt can throw the alignment off. If you feel the urge to shift, pause, take a breath, then resume.
Another sneaky error is using the wrong side of the ruler. Some templates have a mirrored side for left‑handed users. Double‑check that the numbers increase from left to right – if they run backwards, you’re looking at the wrong side.
And don’t forget to measure twice. A quick sanity check: measure once, step away, then measure again. If both readings match, you’ve got a reliable number.
Take Maya, a first‑time glasses buyer. She printed the ruler, measured her PD twice, and got 63 mm each time. She entered that number on the BuyEyeglass checkout and her single‑vision frames arrived perfectly centered – no return, no extra cost.
Contrast that with Sam, who skipped the double‑check. He read 61 mm (when his true PD was 64 mm). The lenses sat too far inward, causing eye strain after a day of work. A quick repeat measurement would have saved him a return fee.
These anecdotes show why that extra minute of verification matters.
Once you’ve ticked those boxes, write the number down or type it into your order form. You’re now ready to place an order that fits like a glove.
Need a reference to make sure your ruler matches industry standards? Target Optical’s printable PD ruler guide offers a clean, calibrated template you can compare against.
Remember, the goal isn’t just to get a number – it’s to feel confident that your glasses will sit comfortably, without constant adjustments or blurry zones.
So, what’s your next move? Grab that ruler, follow the steps, and let the numbers speak for themselves. You’ll be amazed how a precise PD transforms the way your new frames feel on your face.
You’ve just read the numbers off your pupillary distance printable ruler—great! But before you hit “order” on BuyEyeglass, take a moment to double‑check that those millimetres are rock solid.
First, look at the ruler again. Does the left mark sit exactly over the centre of your left pupil? Does the right mark line up the same way? If either mark is a hair off, the whole measurement shifts.
We like to repeat the process twice, stepping away for a few seconds in between. That pause resets your focus and helps you spot any drift. When both readings match, you’ve got a reliable PD.
Wondering why this extra step matters? A study note from Sunnyside Vision Center’s home‑measurement guide points out that a half‑millimetre error can cause eye strain, especially with progressive lenses.
Now that you’ve confirmed the number, grab a pen or open a note on your phone. Write the figure in millimetres exactly as you read it—no extra zeros, no “mm” after the number unless you need it for clarity.
Why not just type it straight into the order form? Because our brains love to fill in gaps, and a tiny typo (like 63 turning into 36) can turn a perfect fit into a frustrating return.
Pro tip: record the measurement twice, side by side, and underline the one you trust most. If you keep a small “PD log” in your eye‑care notebook, you’ll never have to hunt for the number again.
Sometimes the two readings differ by a millimetre or two. That’s a sign you need a quick sanity check.
If after another round the numbers still disagree, trust the average of the two readings. Most online retailers, including BuyEyeglass, accept a PD that’s within a millimetre of your true measurement.
| What to Verify | Why It Matters | Quick Tip |
|---|---|---|
| Ruler alignment on nose bridge | Ensures the distance reflects true pupil centres | Place the ruler gently, no pressure |
| Mirror clarity and lighting | Prevents shadows that hide the pupil centre | Use natural daylight or a bright LED |
| Consistency of two readings | Confirms measurement accuracy | Step away 10 seconds, then repeat |
All set? Grab your pen, jot down the final number, and feel confident that your new glasses will sit where they belong—right in front of your eyes, not sliding down your nose.
Next up, you’ll head to the checkout page, paste the PD, and let BuyEyeglass do the rest. Trust the process, and enjoy crystal‑clear vision without the hassle of returns.
Once you’ve written the number down, think ahead. The same PD works for single‑vision, bifocal or progressive frames, so you’ll never have to measure again unless your prescription changes. A quick trick is to snap a photo of your handwritten note and save it to a cloud folder or your phone’s notes app. That way, when you’re browsing the BuyEyeglass catalogue, the PD is just a tap away.
Ever gotten a number that feels a little off and wondered if you just mis‑read the ruler? You’re not alone – the pupillary distance printable ruler can be surprisingly picky.
If the strip bends or lifts at the bridge, the marks shift a millimetre or two. Gently press the paper against your nose, making sure there’s no curl. A quick sanity check? Hold a known 150 mm ruler next to the printable ruler; the ends should line up perfectly.
Most errors trace back to scaling the PDF to “Fit to page”. When the ruler shrinks, every millimetre shrinks with it, and your PD will be short. Open your printer dialogue, select “Actual size” or 100 % scaling, and print a test strip. If you’re unsure, compare the printed millimetre marks with a standard ruler – they should match.
A foggy or glossy surface can make the dark circle of the pupil blend into the background. Wipe the mirror with a dry cloth and adjust the lighting until the pupil stands out clearly. Natural daylight works best; a bright LED without harsh shadows is a close second.
Some printable templates have a mirrored side for left‑handed users. If the numbers run from right to left, you’re looking at the wrong orientation. Flip the ruler over and verify that the scale increases from your left eye to your right eye before you start.
Even a seasoned pro can miss a tiny shift. Measure, step away for ten seconds, then measure again. If the two readings differ by more than 0.5 mm, repeat the process. Most online retailers, including BuyEyeglass, will accept a PD that’s within a millimetre of your true value, but the closer you get, the more comfortable your glasses will feel.
Picture this: you printed the ruler on glossy photo paper, placed it on a slightly warped coffee table, and got 61 mm instead of your actual 64 mm. The lenses arrived a little too narrow, and you spent an afternoon adjusting the frames. The fix? Switch to matte paper, use a flat countertop, and re‑measure – you’ll likely land on the correct number.
Another common hiccup is measuring with your head slightly tilted. That tiny angle can add a millimetre or two. Use a simple trick: place a sticky note on the bridge of your nose, line the ruler up, then look straight ahead. If the note stays level, your head is level too.
When you’ve run through the list and everything checks out, you can record the number with confidence. If you still see discrepancies, it’s worth a quick peek at a professional guide for extra reassurance. Mega Vision Brooklyn explains why precise alignment matters for comfort and visual clarity.
Bottom line: the printable ruler is a fantastic low‑cost tool, but it demands a bit of care. Treat the ruler like a tiny instrument – keep it flat, keep the scale true, and always double‑check. With those habits in place, you’ll avoid the frustrating returns that happen when a single millimetre is off, and you’ll enjoy glasses that sit just right from day one.
Now that you’ve got a solid PD number on paper, the next hurdle is getting that figure onto an online order without losing any of the precision you just fought for.
First thing’s first: double‑check that you’re looking at the right unit. Most sites ask for the distance in millimetres, not centimeters or inches, so a quick glance at the field label can save you from typing “63” when the form actually expects “63 mm”. If you accidentally add a zero, you’ll end up with a 630 mm lens – something no one wants to see.
When you head to the checkout page on BuyEyeglass, you’ll usually find the PD box right next to the prescription fields. Paste the number exactly as you recorded it – no extra spaces, no “mm” suffix unless the form explicitly asks for it. A common mistake is to copy‑paste from a note app that adds hidden formatting; a quick tap on the field and re‑type the digits guarantees a clean entry.
If you’re ordering progressive lenses, there’s an extra checkbox that says “include PD for near vision”. For most adults the near‑PD is only a couple of millimetres larger than the distance PD. If you don’t have that number handy, a safe bet is to add 2–3 mm to the distance PD – but if you can, measure it separately using the same printable ruler. The extra step helps the progressive corridor line up perfectly with your eyes.
A tip that many first‑timers overlook: keep a screenshot of the completed order page before you hit “Place Order”. If anything goes wrong – say the retailer flags a mismatch between the PD and the lens type – you’ll have a record of exactly what you entered. It also makes it easier to request a correction without having to redo the whole measurement process.
If you’re ordering multiple pairs – say a daily wear set and a backup pair for travel – you can reuse the same PD across both orders. Just make sure each order’s PD field is filled out; some platforms forget to carry the value over when you add a second item to the cart. A quick glance at each line item prevents that annoying “missing PD” error.
Here’s a quick checklist to run through before you finally smash that “Submit” button:
And remember, the printable ruler isn’t a one‑off gimmick – it’s a reusable tool. Store it in a safe spot, maybe laminated, so the next time you need a new pair of glasses you can skip the whole learning curve.
So, with your PD safely logged into the order form, you’re all set. Your new lenses will sit right over your pupils, delivering the crisp, strain‑free vision you were aiming for. Happy shopping!
Finally, if you ever notice the glasses feel off after a few weeks, double‑check that the PD you entered matches the label inside the frame’s case – it’s a quick sanity check that can save you another round of returns.
A pupillary distance printable ruler is a PDF‑based strip that already has millimetre markings built in. You print it on regular letter‑size paper, cut along the dotted edge, and line the two vertical markers with the centre of each pupil. Because the scale is fixed, the distance you read off the strip is your PD – the exact gap between your eyes measured in millimetres.
Yes – the same measurement works for single‑vision, bifocal and progressive lenses. The PD tells the lens maker where to centre the optical centre of each lens, regardless of the prescription design. For progressives you might also need a near‑PD, which is usually a couple of millimetres longer than the distance PD. If you don’t have a near‑PD, adding 2–3 mm is a safe fallback.
First, open the PDF and check that the ruler shows markings from 0 mm to at least 80 mm. When you send it to the printer, select ‘Actual size’, ‘100 %’, or ‘None’ – any option that says no scaling. Double‑check the printer dialog isn’t set to ‘Fit to page’ or ‘Shrink to fit’. After printing, compare the top and bottom of the strip with a known 150 mm ruler; the ends should line up perfectly.
Sit about 20 cm (8 in) from a plain mirror, place the printed ruler gently against the bridge of your nose and line the left mark with the centre of your left pupil. Keep the ruler flat, then slide it until the right mark meets the centre of your right pupil. Read the number between the marks – that’s your PD. Do it twice and use the same reading for consistency.
You should re‑measure whenever your prescription changes, which typically happens every one to two years, or if you notice the glasses feel off or cause eye strain. Major life events – like a significant weight change, pregnancy, or a new pair of frames that sit differently on your nose – can also shift your PD slightly. A quick check with the printable ruler before each new order ensures you stay accurate.
The most common errors are printing the PDF at the wrong size, using a glossy sheet that warps, and mis‑aligning the ruler on the nose bridge. To avoid scaling issues, always set the printer to 100 % and verify the ruler length against a known 150 mm ruler. Keep the paper flat and cut cleanly along the dotted line. Finally, double‑check that the numbers increase from left to right; a mirrored side will give you the opposite reading.
When you’re ready to buy on BuyEyeglass, you’ll find a dedicated PD field right next to the prescription boxes at checkout. Enter the number exactly as you recorded it – no extra spaces or ‘mm’ unless the field asks for it. Double‑checking the entry prevents a costly return, because an incorrect PD shifts the optical centre and can cause blur or eye strain. If you are ordering progressive lenses, look for the optional near‑PD field and fill it in using the same ruler.
You’ve made it through every step, from downloading a calibrated pupillary distance printable ruler to double‑checking your numbers before you hit checkout. That extra minute of patience saves you from the frustration of returns and the extra cost of re‑ordering.
So, what’s the biggest takeaway? Treat the ruler like a tiny instrument: print at 100 % scale, cut cleanly, verify against a known 150 mm ruler, and measure twice. When you follow those habits, the PD you enter on BuyEyeglass will line up perfectly with your eyes, and the lenses will feel like they were made just for you.
Remember the little tricks we mentioned – use natural daylight, keep the mirror clean, and watch the numbers increase from left to right. If anything feels off, pause, step away, and measure again. That pause is the difference between blurry vision and crystal‑clear focus.
Finally, keep your printed ruler somewhere safe – maybe laminate it – so the next time you need a new pair, you won’t have to start from scratch. When you’re ready, pop that PD into the checkout field and let BuyEyeglass handle the rest. Happy measuring, and enjoy glasses that truly fit!