Ever notice that weird sliding sensation when your glasses sit on the bridge of your nose, then suddenly the pads feel flat or even fall off?
You’re not alone – most of us have been there, squinting at a screen or reading a menu while the frames keep slipping, and that tiny discomfort turns into a full‑blown annoyance.
What if I told you that fixing it is as simple as swapping out a tiny piece of silicone, no expensive trip to the optometrist required?
In this guide we’ll walk through how to replace nose pads on glasses step by step, from gathering the right tiny tools to making sure the new pads sit perfectly on your nose.
Think about the last time you bought a new pair of frames. You probably chose a style that matched your personality, but the comfort factor can be easy to overlook until the pads start digging or wobbling.
Replacing them yourself not only saves money, it also gives you the freedom to pick the exact material—soft silicone for a gentle feel, or firmer rubber for a more secure grip.
We’ll share a few practical tips that we’ve seen work for countless customers, like using a tiny flat‑head screwdriver or even a clean toothpick to pry old pads loose without scratching the frame.
And because every pair of glasses is a little different, we’ll cover how to identify the right size and shape, plus a quick checklist to avoid common pitfalls like over‑tightening or damaging the mounting screw.
By the end of this article you’ll feel confident enough to handle the swap in under ten minutes, and you’ll never have to endure that annoying slipping feeling again.
Ready to give your glasses a fresh, comfortable fit? Let’s dive in and replace those nose pads together today.
If your glasses keep slipping or digging, you can fix the problem in minutes by learning how to replace nose pads on glasses yourself.
Grab a tiny screwdriver or toothpick, choose the right silicone or rubber pad, follow our quick step‑by‑step guide, and enjoy a comfortable, secure fit without a pricey optometrist visit.
Before you even think about prying the old pads off, take a quick inventory of what you’ll need. Trust me, having the right tiny tools on hand makes the whole thing feel less like a surgery and more like a quick DIY fix.
• A tiny flat‑head screwdriver – the kind that comes with eyeglass repair kits or even a precision set for electronics. If you don’t have one, a clean toothpick works in a pinch, but a screwdriver gives you better control.
• A pair of tweezers (fine‑point) – handy for holding the new pad steady while you screw the mount back in.
• A soft cloth or lint‑free pad – just to lay your glasses on so you don’t scratch the lenses.
The market offers silicone, rubber, and even gel pads. Silicone feels plush and is great for sensitive skin; rubber gives a firmer grip if you’re a very active wearer. Look at the diameter of the existing pad – most are between 2 mm and 5 mm. If you’re unsure, bring the old pad to a local optical shop; they can match the size for you.
And here’s a tiny tip: many of our customers keep a small assortment of pads in a zip‑lock bag. That way, when a pair of summer sunglasses starts slipping, you’ve already got the right size waiting.
Find a well‑lit spot – natural light is best, but a desk lamp works too. Lay the cloth down, place the glasses face‑up, and keep the tiny screwdriver within reach. It’s amazing how a few seconds of organization saves you from fumbling later.
Does it feel a bit like a mini‑science experiment? That’s the fun part. You’re about to give your glasses a fresh lease on life, and all it takes is a couple of minutes.
Now, if you’d like a visual walkthrough, check out the short video below. It walks you through each motion, from loosening the screw to snapping the new pad into place.
Once the video finishes, you’ll probably feel ready to dive in. But before you do, give yourself a quick sanity check: do you have the screwdriver, tweezers, cloth, and the right‑size pad? If anything’s missing, pause and grab it now – you’ll thank yourself when the screw doesn’t strip.
One more thing to watch out for: the tiny screw that holds the pad in place can be delicate. Turn it clockwise just enough to snug the pad; overtightening can strip the threads or crack the mounting arm.
When you’ve gathered everything, you’re set for the next step: removing the old pad. Having the tools ready means you won’t have to scramble mid‑process, and you’ll keep the whole experience smooth and frustration‑free.
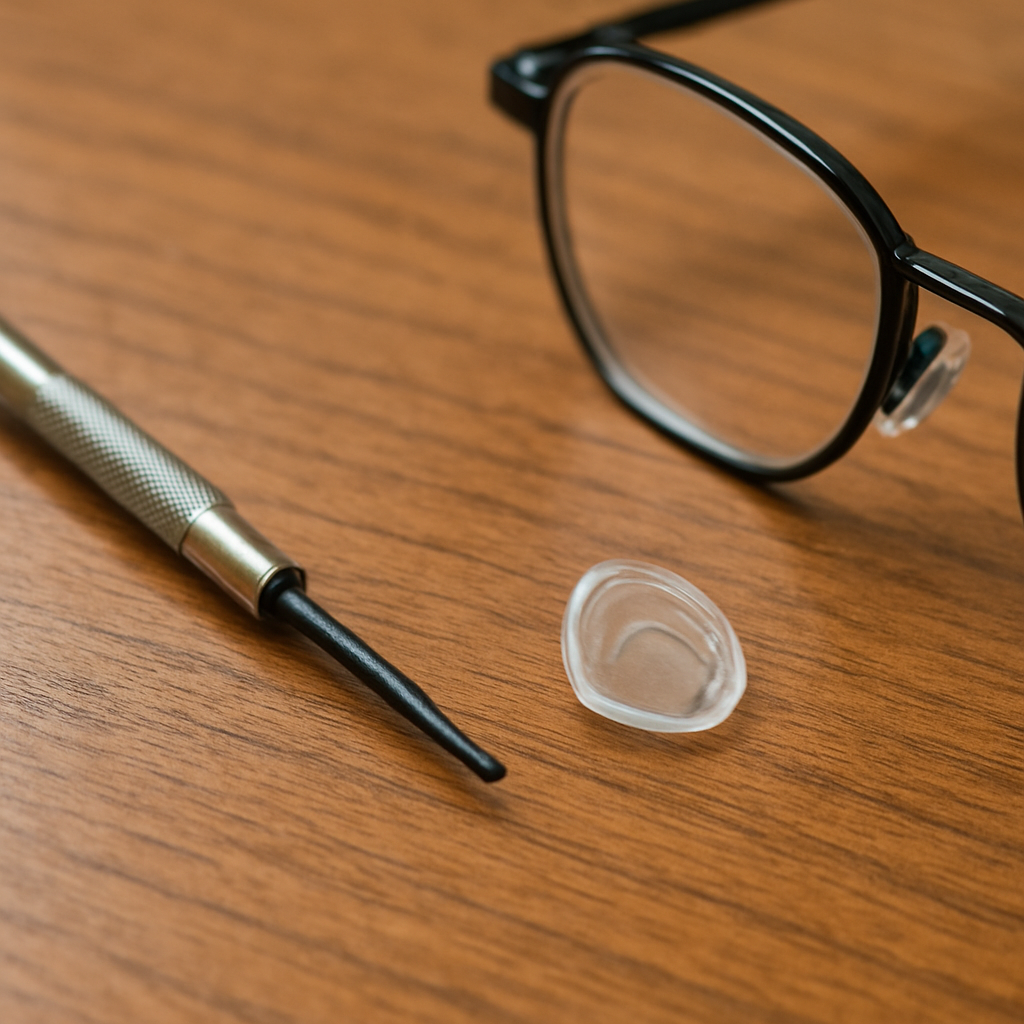
Need a visual reminder of what the tools look like together? Imagine a close‑up of a tiny screwdriver, a silicone nose pad, and a pair of glasses resting on a wooden desk – that’s the perfect snapshot of your “tool kit” right now.
Alright, you’ve got your tiny screwdriver and pliers in hand, and the frame is sitting nice and steady. The next thing you need to do is actually get that old pad off without turning the whole bridge into a tiny sculpture.
First, take a soft cloth—something like the one you used to wipe the lenses—and wrap it around the lenses. This simple trick keeps the glass from getting scratched while you’re fiddling around the tiny screw.
Now locate the little screw that holds the pad to the mounting post. On most metal frames it’s a tiny Phillips‑type or flat‑head screw; on some plastic frames the pad is a snap‑on piece. If you’re not sure which kind you have, give the post a gentle tug; a snap‑on will give a little give, whereas a screw‑in will feel rigid.
For screw‑in pads, pop the micro flat‑head screwdriver into the slot. You’ll notice the head is almost flush with the pad – that’s on purpose, so you don’t gouge the frame. Turn the screw counter‑clockwise just a half turn. If it resists, apply a tiny bit of pressure while wiggling the tip. Patience beats force; you’ll avoid stripping the threading. All About Vision provides a clear walkthrough of safely removing nose pads.
If the screw seems stuck, here’s a tip we’ve found works wonders: grip the head of the screw with needle‑nose pliers and turn it slowly. The extra leverage often frees a screw that’s been sitting for months. Remember to keep the motion smooth – jerky moves can snap the tiny arm that holds the pad.
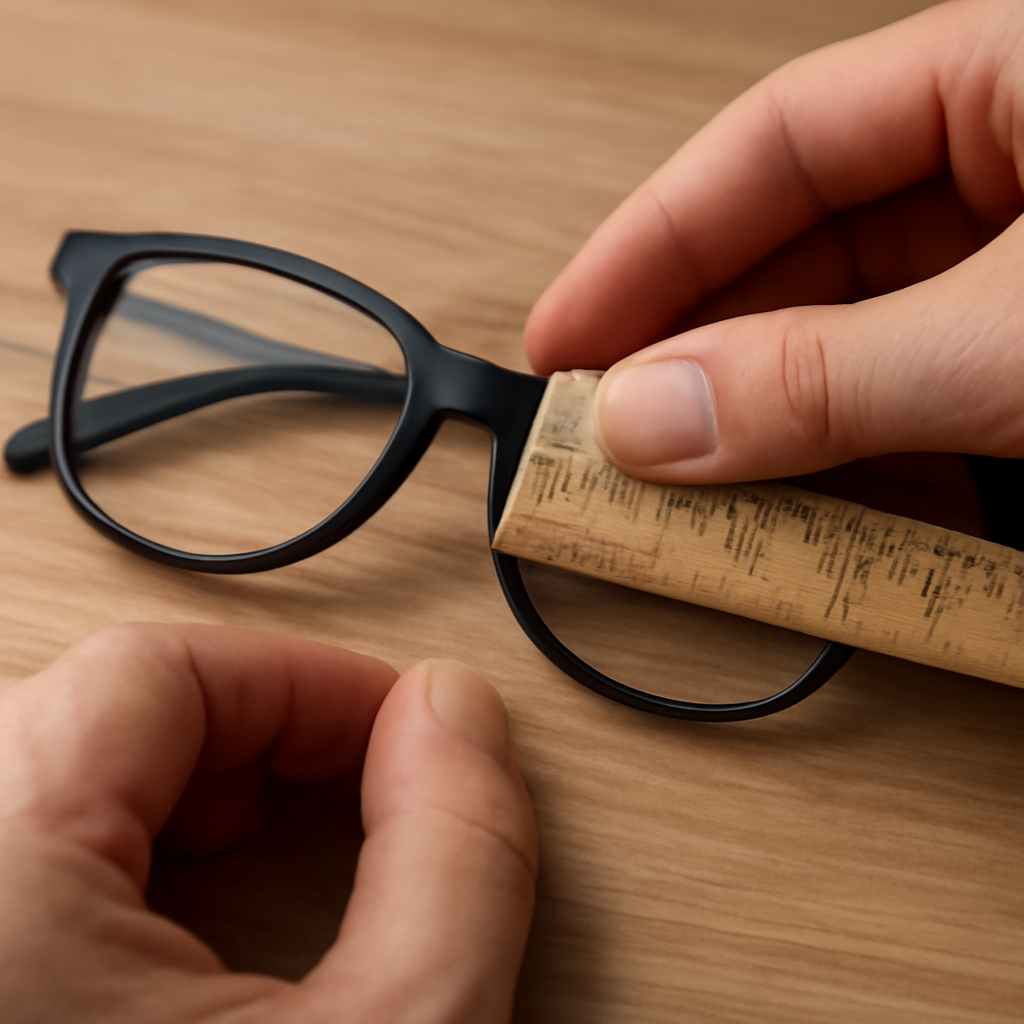
Snap‑on pads are a bit different. Grab a clean toothpick or the tip of your screwdriver and slide it under the edge of the pad. Gently pry upward; the pad should pop free in one smooth motion. If it’s stubborn, a dab of a tiny amount of petroleum jelly on the edge can reduce friction, but wipe it off before you put the new pad on.
Once the pad lifts away, take a quick look at the mounting post. It should be straight, clean, and free of debris. A stray thread of dust or a smudge can make the new pad sit unevenly, leading to that annoying slip later on.
If the post is bent, don’t panic. Using the same needle‑nose pliers, very gently bend it back into shape. It only takes a slight adjustment – you’re basically giving the post a tiny nudge, not a full‑on remodel.
Now that the old pad is off and the post is ready, give everything a final wipe with your cleaning cloth. This step removes any fingerprints or oil that could interfere with the adhesive on a silicone pad.
A quick sanity check: try to turn the empty post with your fingertip. It should spin freely but not feel loose. If it feels wobbly, you might have stripped the screw hole – in that case, it’s safer to head to a professional rather than force a new pad in.
One last thing to remember – keep the old pad and screw together in a small container. If the new pad comes with its own tiny screw, you’ll want to compare sizes to make sure they match. Most replacement pads use the same standard 1 mm screw, but a mismatch can lead to a loose fit.
That’s it for the removal stage. You’ve just cleared the way for a fresh, comfortable set of pads that’ll keep your glasses sitting where they belong. In the next step we’ll walk through matching the pad size to your nose shape and snapping the new ones into place.
Now that the posts are clean and the old pads are safely stored, the next decision is which new pads will actually sit comfortably on your nose.
It might feel like a tiny detail, but the right pad can turn a pair of glasses from “just okay” to “I could wear these all day.”
First, double‑check how the pad attaches to the frame. Most metal frames use a tiny screw‑in mount, while many plastic frames rely on a snap‑on or push‑in style.
If you see a little hole and a screw head, you’re dealing with a screw‑in. If the pad simply clicks on, that’s a snap‑on. Knowing this prevents you from buying a pad that won’t fit.
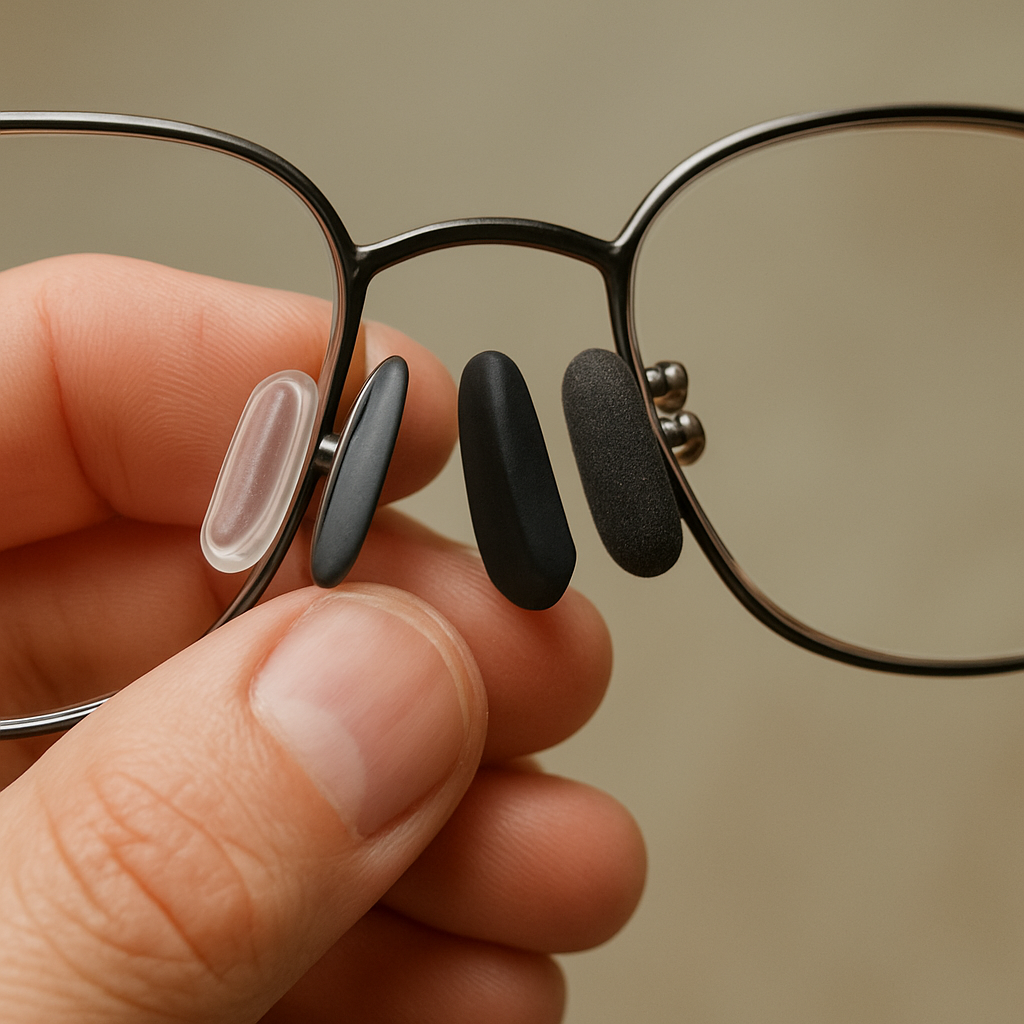
Silicone is the go‑to for most people because it’s soft, flexible, and molds to the contours of your nose. It’s what we at BuyEyeglass usually recommend for everyday wear.
Rubber or firmer silicone pads give a tighter grip, which is handy if you have an active lifestyle or tend to sweat a lot.
Foam pads are ultra‑light and great for kids or anyone who wants a barely‑there feel, but they may need replacing more often.
According to optical experts at Stenberg College, silicone pads are the most comfortable material, while plastic pads are less comfortable but more durable.
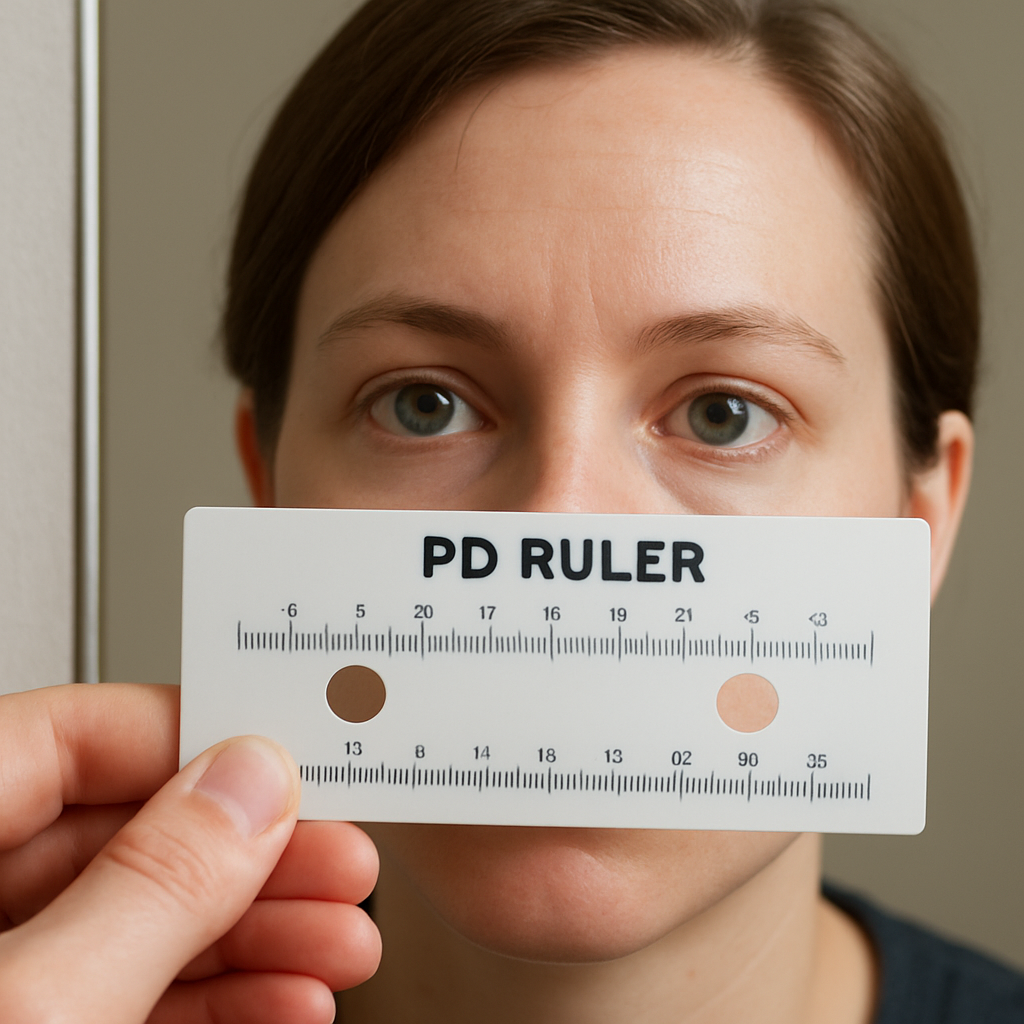
Grab a ruler that measures in millimetres. Most pads range from about 9 mm to 24 mm in width. Even a 1 mm difference can change how the weight of the glasses is distributed across your bridge.
Look at the current pads: are they round, oval, or a teardrop? Symmetrical pads can be swapped left‑to‑right, while asymmetrical ones have a flat side that must face away from your face.
The guide from Group Medical Supply walks you through measuring and identifying the correct shape, so keep it handy while you shop.
| Feature | Option | Notes |
|---|---|---|
| Mount Type | Screw‑in, Snap‑on, Push‑in | Match exactly to your frame |
| Material | Silicone, Rubber, Foam | Silicone = comfort; Rubber = grip; Foam = lightweight |
| Size/Shape | 9‑24 mm, Round/Oval/Teardrop | Measure current pad; choose symmetrical if unsure |
Use this table as a quick reference when you browse a pack of replacement pads online or in a store.
Jane, a freelance graphic designer, swapped her thin metal frames’ original plastic pads for medium‑size silicone ones. Within a day she noticed less pressure on the bridge and could work longer without headaches.
Mike, an avid cyclist, prefers rubber pads because they stay put even when he sweats on a steep hill. He chose a slightly larger oval pad to spread the pressure and avoid digging into his nose.
For a child’s bright‑coloured frames, foam pads worked well—light enough that the little one barely felt them, yet they provided enough grip to keep the glasses from sliding down during playground time.
– Keep the original screws. Even though many new pads come without screws, the ones that came with your glasses are usually the right length and thread.
– If you’re unsure about the size, buy a mixed‑size starter kit. Most kits include 9 mm, 12 mm, and 15 mm pads in both round and oval shapes.
– After installing, give the pads a gentle “wiggle test.” They should stay snug but not feel like they’re pulling the frame out of alignment.
Once you’ve picked the right pad, the next step is to snap or screw them back on and fine‑tune the position for that perfect, buttery‑smooth fit.
Now that you’ve got the right pad in hand, it’s time to get it on the frame without turning the whole thing into a miniature construction site.
Take the new silicone (or rubber, if that’s your thing) pad and look at the tiny screw that came with it. In most cases the screw is already threaded into the pad, but if it isn’t, gently screw it clockwise until you feel a light resistance. You don’t want to overtighten – a fingertip’s worth of torque is enough.
Hold the pad so the flat side faces outward (that’s the side that will touch your nose). If you’re using an oval pad, make sure the longer axis is oriented horizontally; that spreads the weight more evenly across the bridge.
Here’s the tricky part that trips up a lot of DIY‑ers: the pad has to sit flush against the post, not tilted or hanging off the edge. Place the pad’s hole over the post’s threaded shaft. You’ll notice a tiny notch on the pad – that’s a guide to keep it level.
Give it a gentle push until you feel it seat. If it feels loose, you’re probably not threading the screw fully. If it feels too tight, back the screw out a half turn and try again.
Grab your micro flat‑head screwdriver and turn the screw clockwise just enough to make the pad snug. A good rule of thumb is the “wiggle test”: once tightened, give the pad a tiny wiggle with your fingertip. It should stay put but not feel like it’s pulling the frame out of alignment.
In our experience at BuyEyeglass, most customers find that a quarter‑turn past the point of resistance is perfect. Anything more can strip the threading or cause the pad to tilt, which brings back the slip.
Glasses are symmetrical, so whatever you did on the left, do on the right. It’s easy to accidentally swap a left‑handed oval pad with a right‑handed one, so double‑check the orientation before you tighten.
If you’re working with a mixed‑size kit, you might have chosen a slightly larger pad on one side for extra comfort. That’s fine – just make sure both pads are level with each other so the bridge stays even.
Once both pads are on, sit the glasses on your nose and look in a mirror. Do they sit evenly? Is one side higher? If something feels off, loosen the screw just a hair and slide the pad up or down the post. Small adjustments of 1‑2 mm can make a huge difference in pressure distribution.
Pro tip: use a clean fingertip or a soft cloth to push the pad while the screw is still slightly loose. That way you can nudge it into the sweet spot without over‑tightening.
Give each pad a final “wiggle test” again. They should feel solid, but you shouldn’t need to use a lot of force to move them. If they still feel loose, you may have a mismatched screw length – try the original screw you kept earlier, or a replacement from a starter kit.
Another quick check: gently pull the glasses away from the bridge. The pads should stay attached to the frame, not come off with the pull.
Mike, the cyclist from earlier, swapped his original rubber pads for slightly larger oval silicone ones. After following the steps above, he noticed his glasses stayed put on steep climbs, and the “wiggle test” was spot‑on – no more adjusting mid‑ride.
Emily, a freelance writer who works long hours at a desk, used a tiny foam pad on her lightweight frames. She positioned it a millimetre lower than her previous pad, which eliminated the pressure point that gave her a headache after a few hours.
And that’s it – you’ve just installed new nose pads securely, giving your glasses a fresh, comfortable fit that should last weeks or even months, depending on use. Next time you notice a slip, you’ll know exactly how to tweak it without a trip to the optometrist.
Alright, you’ve got the new pads screwed in – now it’s time to make sure they actually feel good. This step is where the rubber meets the road, or rather, where the pads meet the bridge of your nose.
First, put the glasses on and look straight into a mirror. Do they sit level, or does one side sit higher? If you notice a tilt, loosen the screw a hair with your micro‑screwdriver, nudge the pad up or down, and retighten. A half‑turn is usually enough; you don’t want to strip the thread.
Next, run a quick “wiggle test.” Gently tap each pad with your fingertip – it should stay put but have a tiny give. If a pad wiggles loose, you’ve probably under‑tightened. Turn the screw another quarter‑turn and test again.
Now ask yourself: does the weight of the frames feel evenly distributed? One way to tell is to press the bridge of the glasses gently with both hands. If the pressure points feel the same on each side, you’re golden. If one side feels like it’s digging, you may need to shift that pad a millimetre up or down.
It’s easy to overlook the tiny gap between the pad and the frame post. Make sure the pad sits flush against the post – no tilt, no wobble. A mis‑aligned pad can create a pressure point that turns a comfortable day into a headache marathon.
Here’s a real‑world snapshot: Emily, the freelance writer we mentioned earlier, noticed a faint ache after a few hours. She loosened the left‑hand pad just enough to let it sit a hair lower, and the discomfort vanished. Small adjustments like that make a world of difference.
Another quick check: the “pull test.” Hold the glasses by the temples and pull them away from the bridge. The pads should stay attached to the frame; they shouldn’t pop off with the pull. If they do, the screw isn’t deep enough – back the pad off, re‑thread the screw, and tighten a bit more.
Don’t forget about the material’s grip. Silicone pads conform to the curve of your nose, but if they’re too soft they can slide on oily skin. A light dab of a non‑greasy facial wipe on the pad surface can improve friction without affecting comfort.
For those with especially sweaty days, a quick breath of cool air on the pads before slipping the glasses on can help the silicone set in place. It’s a tiny habit that many of our Glendale Heights customers swear by.
Finally, give yourself a minute to walk around, sit, and even lean forward. Does the glasses stay where you left them? If they start to slip when you lean, try moving the pad a fraction closer to the frame’s centre line – that shifts the pivot point and often cures the slip.
When you’re satisfied, do one last visual scan in the mirror. Both pads should be parallel, the bridge should sit comfortably, and your reflection should show a confident, no‑slip smile.
If after all these tweaks the glasses still feel off, it might be a deeper frame‑alignment issue that needs a pro’s touch. In that case, a quick visit to your local optician can save you hours of trial‑and‑error.
Need a refresher on the whole process? Check out iDoctor’s detailed guide on nose pad replacement for extra pictures and troubleshooting tips.
We’ve walked through every little twist and turn of swapping out those tiny nose pads, so you now know that a ten‑minute tweak can save you hours of frustration. Remember, the magic is in the details – a snug screw, the right material, and a tiny bit of patience.
Here’s a quick cheat‑sheet: grab your micro‑screwdriver, clean the post, match the pad size, thread the screw just past resistance, run the wiggle test, and walk around to make sure nothing slides. If the fit still feels off, a half‑millimetre shift up or down can make all the difference.
Real‑world examples drive the point home. Jane, a freelance graphic designer, swapped her plastic pads for silicone and stopped the daily bridge‑pressure headache. Mike, a cyclist, chose rubber pads and noticed his glasses stayed put even on steep climbs. Those tiny adjustments add up to big comfort gains.
In case you hit a snag – like a stripped screw or a bent post – don’t force it. A quick visit to a local optician can save you a broken frame. For a fast refresher on fine‑tuning the position, check out our How to Adjust Nose Pads on Glasses: A Simple Step‑by‑Step Guide.
And if you ever wonder whether a professional eye exam is due, especially after making hardware changes, it never hurts to consult an eye surgeon like Dr Rahul Dubey for personalized advice. Happy adjusting, and enjoy the slip‑free view!
First, pop the old pad off and glance at its width. Most pads are stamped with a number like 9 mm, 12 mm, or 15 mm – that’s the size you’ll need to match. If there’s no marking, measure from edge to edge with a tiny ruler; a difference of even a millimetre can change how the weight sits on your nose. When you buy a starter kit, grab the size that’s closest to your measurement and test it on the bridge before you screw it in.
Yes, the same basic idea works for metal and plastic frames, but the mounting method can differ. Metal arms usually have a tiny screw‑in nose pad, so you’ll need that little screw to hold the new pad in place. Many plastic frames use a snap‑on style that simply clicks onto a post – no screw required. The trick is to identify which type you have first; a gentle tug will tell you if it gives or feels solid. Once you know, just follow the appropriate removal and install steps we covered earlier.
The only tools you really need are a micro flat‑head screwdriver (the size of a toothpick), a pair of needle‑nose pliers for stubborn screws, and a soft lint‑free cloth to keep the bridge clean. A tiny ruler or a set of pre‑measured nose‑pad kits can save you the guesswork on size. If you’re working with snap‑on pads, a clean toothpick works just as well as a screwdriver tip. Having these items on your nightstand means you’ll never scramble for the right tool when a pad starts to dig.
Stripping the screw is a common fear, but a gentle approach keeps the threads intact. Start by turning the screw counter‑clockwise only a quarter‑turn; you should feel a slight give before it resists. If it sticks, press the screwdriver tip lightly against the slot and wiggle it back and forth – that tiny rocking motion often frees a stubborn screw without torque. When the screw finally turns, stop as soon as the pad lifts. Avoid using too much force; if it still won’t move, it’s safer to let a professional handle it.
After the new pad is on, give it a quick wiggle test – it should stay put but have a feather‑light give. Tighten the screw just past the point where you feel resistance; a fingertip’s worth of torque is enough. Too tight and the post can warp, too loose and the pad will slide off when you tilt your head. If you notice any wobble, back the screw out a half‑turn, reposition the pad, and retighten. A little patience now saves you a slip later.
Nose pads are tiny but they wear out faster than the rest of the frame because they’re constantly pressed against skin and oil. As a rule of thumb, check them every few months – especially if you notice a new pressure point or a slight slide. If the silicone feels hard, cracked, or the edges are frayed, it’s time for a swap. For most daily wearers, replacing pads once or twice a year keeps the bridge comfortable and extends the life of the glasses.
Now that your new pads are snug, the real secret to a slip‑free life is a little routine maintenance. Think of it like oiling a bike chain – a quick check every few weeks keeps everything running smooth.
Grab a lint‑free cloth and look at the pads. If the silicone looks cloudy, cracked, or a shade darker, that’s a sign it’s time for a swap. NextPair recommends replacing nose pads every 6–12 months, but if you notice wear sooner, don’t wait.
While you’re there, give the tiny screw a gentle twist. It should feel firm but not stripped. A half‑turn past resistance is enough – you don’t want to crush the threads.
Every couple of weeks, run a mild soap‑water rinse over the pads and the mounting posts. That removes skin oils that can make silicone slipier over time. Dry with a soft cloth; avoid paper towels that might leave fibers.
If you wear glasses while cooking or exercising, a quick swipe after each session can prevent buildup that leads to a loose feel later.
We’ve all had that moment when a pad cracks mid‑day and you’re stuck. Stashing a few extra silicone pads (and the tiny screwdriver) on your nightstand or in your bag saves the panic. It’s the same principle that keeps a spare battery in the car.
When you pull a new pad from the kit, compare it to the one you just removed. If the size or shape differs, double‑check the fit before tightening.
Extreme heat can warp plastic frames, which in turn can loosen the pad posts. Try not to leave glasses on a sunny dashboard. Likewise, excessive humidity can make silicone a bit softer, so a dry storage spot helps maintain grip.
Finally, give your glasses a “wiggle test” before you head out. A gentle tug should feel solid, not wobbly. If anything feels off, loosen, adjust, and retighten – it only takes a second.
Stick to this simple checklist and your nose pads will stay comfortable for years, saving you both money and the annoyance of constant readjustments.