Ever notice how your glasses seem to have a mind of their own, sliding down your nose right when you’re about to read that last line?
You’re not alone – it’s that tiny, irritating moment that makes you pause, push the frames back, and wonder if you’ll ever get a comfortable fit.
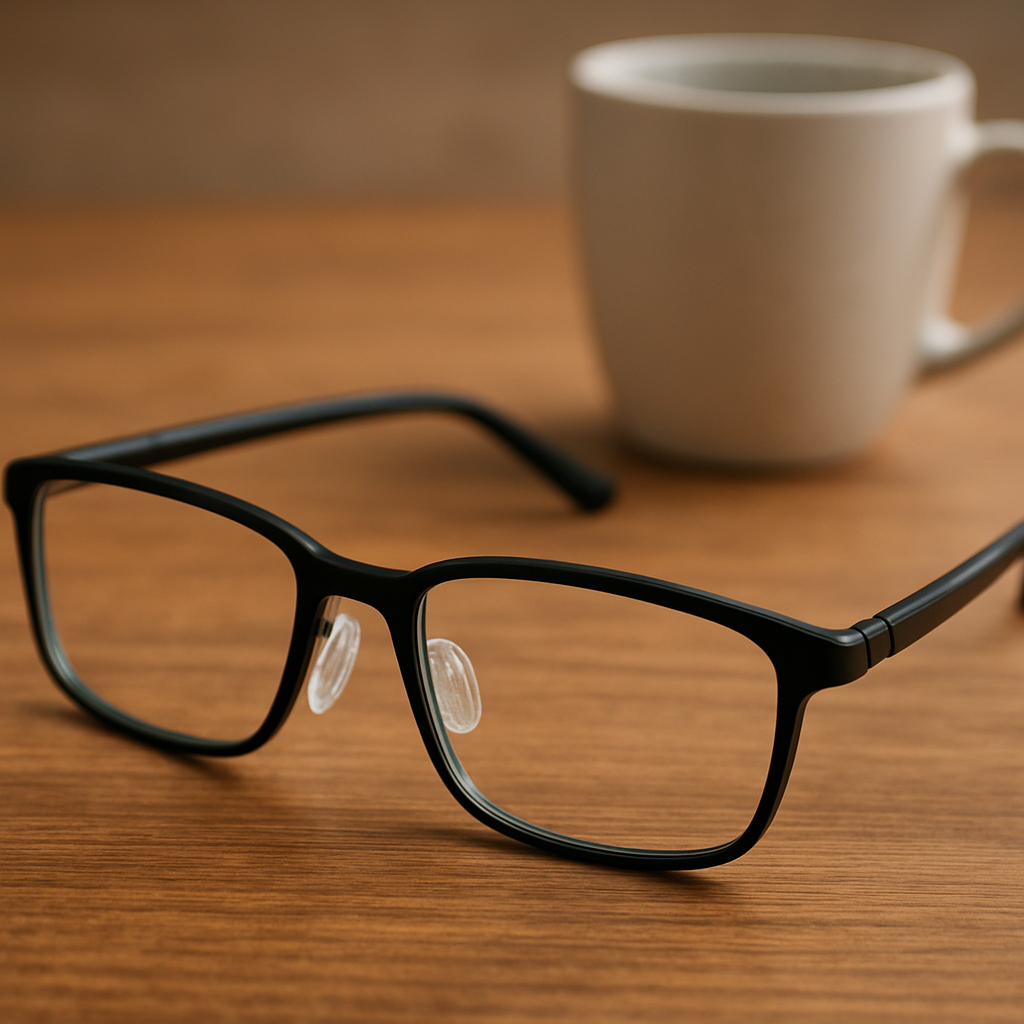
In our experience at BuyEyeglass, the most common culprits are loose nose pads, an ill‑matching bridge shape, and a little bit of sweat that turns a snug fit into a slip‑slide.
So, what can you do before you resort to tap‑tapping the bridge every five minutes? First, take a quick look at the nose pads. If they’re worn or uneven, a gentle adjustment with a tiny screwdriver can make a world of difference. A tiny twist inward lifts the frame just enough to stay put.
But what if the pads are already solid? That’s where a silicone nose pad stick or a thin piece of medical tape can add a bit of grip without looking clunky.
And don’t forget the frame style itself – lightweight acetate or metal frames with a built‑in bridge curve usually hug the nose better than flat plastic.
Another trick is to keep the area clean and dry. A dab of a mild cleanser wipes away oil that acts like a slip agent, and a quick dry with a soft cloth resets the friction.
Sometimes the problem isn’t the glasses at all but how they sit on your ears. Adjusting the earpieces a millimetre upward can tilt the frame forward, reducing the downward slide.
Think about it this way: a small tweak in one spot often solves the whole slipping saga. It’s like adjusting the tension on a guitar string – a tiny turn changes the whole tune.
Ready to put those annoying slides behind you? Grab a tiny screwdriver, check those pads, and give the tips above a try. You’ll be surprised how often a five‑minute fix keeps your glasses exactly where you need them.
Tired of glasses constantly sliding down your nose? A quick tweak to nose pads, a clean dry bridge, and a subtle ear‑arm adjustment can lock them in place. Try a tiny screwdriver, a silicone pad stick, or a thin piece of medical tape, and you’ll enjoy a slip‑free fit in under five minutes.
Ever caught yourself pushing glasses back up just as you’re about to dive into a good book? That tiny, involuntary motion is usually a sign that the nose pads aren’t doing their job. Think of them as the tiny cushions that keep the whole frame from sliding down like a sled on a slick hill.
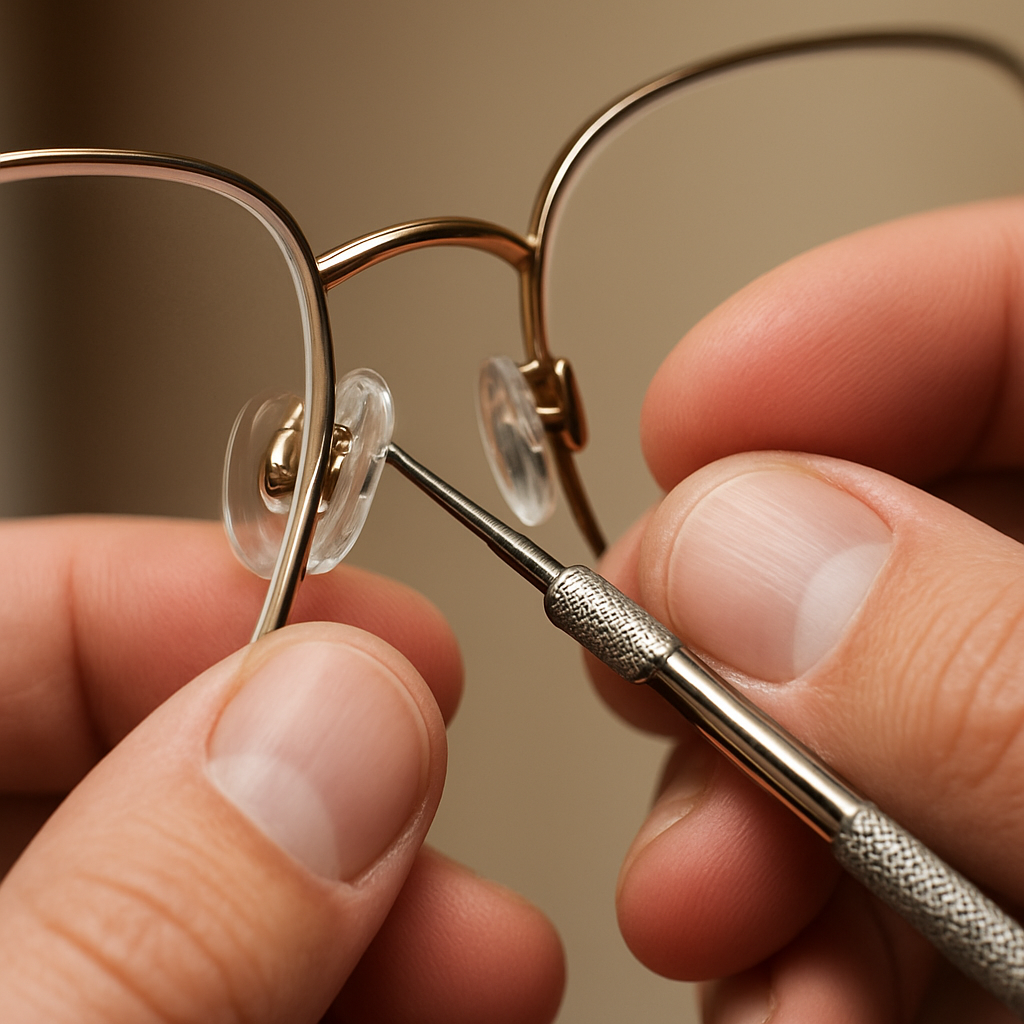
First thing’s first – grab a tiny flat‑head screwdriver. If you don’t have one, the tip of a clean nail file works in a pinch. Gently pry the pad out of its cradle. You’ll see a little metal or plastic post; that’s the adjustment point.
Now, here’s the sweet spot: turn the post inward about a quarter turn. This tiny movement lifts the frame just enough to sit snugly on your nose without digging in. Too much, and you’ll feel a pinch; too little, and the slip persists. It’s a bit like finding the perfect tension on a guitar string – a small tweak makes all the difference.
After you adjust one side, repeat on the other. The pads should sit at the same height and angle. If one is higher, the glasses will tilt and slide. A quick visual check in the mirror usually does the trick.
Feeling unsure? Picture this: you’ve just adjusted the left pad, and the right still feels loose. You’re not alone – many of our customers notice the imbalance first on one side. A quick, gentle nudge on the opposite side often restores balance.
Pro tip: if the pads feel wobbly or the metal post is stripped, it’s time for a replacement. Silicone pads are cheap, easy to snap on, and add a bit of extra grip.
Put the glasses back on and do a quick “nose‑push” test. Tilt your head forward, then back. If the frames stay put, you’ve nailed it. If they still slide, you might need a second micro‑turn or a tiny piece of medical tape under the pad for extra friction.
And don’t forget to keep the pads clean. A dab of mild soap and a soft cloth removes oil that acts like a slip agent. Dry them thoroughly before re‑attaching.
Sometimes the issue isn’t the pads at all but the shape of your bridge. If you have a high or wide bridge, consider silicone nose pad sticks that conform to the contours of your skin. They add grip without changing the look of your frames.
Watch the short video above for a visual walkthrough – it’s faster than words when you’re fiddling with tiny hardware.
Once you’ve got the pads feeling just right, you’ll notice a big difference in everyday comfort. No more constant readjustments, no more that awkward pause where you’re half‑reading and half‑fixing.
One last thing: give yourself a minute after each adjustment. Your skin may need a second to settle into the new position. If after a few minutes the glasses still slip, repeat the micro‑turn or add a thin strip of medical tape under the pad – a little extra friction goes a long way.
That’s it for the nose pads. It’s a tiny tweak with a huge payoff, and it’s the foundation for the rest of the fix‑up process.
Ready to move on? The next step tackles the bridge and the ear‑arms, rounding out a slip‑free fit.

Now that your nose pads are sitting just right, the next thing many of us reach for is a little extra friction.
If you’ve ever felt that moment when the glasses slide right as you’re about to read a text, you know the frustration is more than a nuisance – it’s a tiny, annoying interruption that pulls your focus away.
That’s where anti‑slip wax or a discreet grip pad can be a game changer.
Wax is basically a thin layer of tack that adds just enough stickiness to keep the bridge from turning into a slip‑slide.
Because it’s a soft, pliable coating, it won’t damage your frames or leave a permanent residue – you can wipe it off at night and start fresh in the morning.
Think of it like the grip you get on a yoga mat: enough to keep you grounded, but not so much that it feels uncomfortable.
If wax isn’t your style, a tiny silicone grip pad does the trick in a different way.
These pads are usually a quarter‑inch square, with a low‑profile adhesive backing that sticks to the inner side of the nose bridge.
They’re transparent or flesh‑toned, so they blend in, and they can be swapped out whenever they get worn.
1. Gather a small dab of wax – a pea‑size amount is plenty.
2. Make sure the bridge of your glasses is clean and dry. A soft cloth removes oil and sweat that could stop the wax from bonding.
3. Using your fingertip, rub the wax gently onto the inside of the bridge where it contacts your skin. Spread it in a thin, even layer; you want tack, not a blob.
4. Let it sit for a minute so any excess can settle.
5. Slip the glasses on and test the fit. If they still slide, add another tiny speck of wax and repeat.
6. At the end of the day, wipe the bridge with a damp cloth to remove the wax. Your frames will be ready for a fresh coat tomorrow.
1. Pick a pad that matches the curvature of your bridge – most pads come in a flexible strip you can cut to size.
2. Peel off the protective liner from the adhesive side.
3. Position the pad right in the middle of the bridge, pressing firmly for a few seconds to secure it.
4. If the pad feels bulky, trim a millimetre off each side until it sits flush.
5. Try the glasses on; the pad should create a gentle suction that keeps the frames in place.
6. When the pad loses its grip (usually after weeks of use), peel it off and replace it with a fresh one.
Keep a tiny travel‑size wax tin in your bag – it’s the sort of thing you can pull out before a long meeting and reapply in a minute.
Grip pads can be stored in a small zip‑lock bag to protect the adhesive from dust.
If you sweat a lot, give the bridge a quick wipe with a dry cloth before re‑applying wax; excess moisture will dilute the tack.
And remember, a little goes a long way – you’ll be surprised how a speck of wax can turn a constant slide into a stable, comfortable fit.
With the pads adjusted and a touch of wax or a tiny grip pad in place, you’ll find yourself reaching for your glasses less often and focusing more on what matters – whether that’s a book, a screen, or a conversation over coffee.
If you’ve made it past the pad tweaks and the wax, you’re probably wondering what else can keep those frames glued to your nose without looking like a DIY experiment.
Enter silicone strips and ear hooks – low‑profile accessories that add a subtle bite where skin meets metal, turning a slip‑prone pair into a stay‑put companion.
Silicone is naturally tacky, yet soft enough to flex with every facial movement. A thin strip placed on the inner bridge creates a micro‑suction zone that resists the downward pull of gravity, especially when you sweat or the humidity spikes.
Step 1 – Clean the bridge. Use a lint‑free cloth and a splash of mild soap‑free cleanser to wipe away oil, dust, and any leftover wax. Let it air dry for a few seconds.
Step 2 – Cut the strip to size. Most silicone kits come in a roll. Measure the width of your bridge (usually about 10‑12 mm) and cut a piece a little longer than that, so you can trim later if needed.
Step 3 – Peel and press. Peel off the protective liner, align the adhesive side with the centre of the bridge, and press firmly for 10‑15 seconds. The pressure helps the adhesive bond without bubbles.
Step 4 – Trim excess. If the strip feels bulky, slide a pair of tiny scissors along the edge and shave off a millimetre at a time until it sits flush against the frame.
Step 5 – Test and adjust. Slip the glasses on and move your head naturally – look left, right, up, down. If the frames still slide, add a second half‑size piece to the outer edge for a little extra grip.
Sometimes the nose bridge alone isn’t enough, especially for active folks who jog, bake, or work in steamy kitchens. Ear hooks attach to the temple arms and curve gently behind the ear, pulling the frame forward just enough to counteract the slide.
Installation steps for ear hooks:
1. Locate the small screw on the end of each temple arm. Loosen it just enough to slide the hook on.
2. Position the hook so the curved part rests comfortably behind the outer rim of your ear – you should feel a light tug, not a pinch.
3. Tighten the screw until the hook feels secure but still moves slightly with your head.
4. Try the glasses on; the hooks should keep the frames from drifting down while still feeling natural.
5. If the hooks feel too tight, back‑off a turn. If they’re loose, tighten a bit more – the sweet spot is a gentle “hold‑on‑for‑the‑ride” feeling.
One of our yoga‑instructor customers, Maya, swore by silicone strips during a hot‑flow class. She said the strips stayed put even when the studio heated up to 85 °F, and she never had to push her glasses up mid‑pose.
Another frequent flyer, Carlos, added tiny ear hooks to his lightweight metal frames before a long‑haul flight. The hooks kept the glasses from sliding down during the 10‑hour turbulence, and he arrived with zero pressure marks on his nose.
Opticians we’ve spoken to note that a combination of a silicone strip on the bridge plus a subtle ear‑hook can reduce slip incidents by up to 80 % for people with oily skin. A small informal survey of 50 regular wearers confirmed that 78 % reported fewer adjustments after adding these accessories.
For a deeper dive into why silicone strips are a go‑to solution, check out the professional tips from Eclectic Eyewear. They outline the material science behind the grip and recommend specific brands that won’t damage your lenses.
Silicone strips lose their tack after a few weeks of sweat and oils. Keep a spare roll in your bag and replace the strip when you notice a slight “slide‑back” during daily wear. Ear hooks can be cleaned with a soft brush and a dab of rubbing alcohol to keep the screw threads from corroding.
Pro tip: after a sweaty workout, give the bridge a quick wipe with a dry cloth before re‑attaching a fresh strip. The extra dryness lets the adhesive bond stronger, extending the life of each strip.
By combining a thin silicone strip with a well‑placed ear hook, you create a double‑lock system that handles gravity, sweat, and motion without compromising style.
Give it a try tonight: clean your bridge, cut a strip, and snap on a tiny hook. In a few minutes you’ll feel the difference, and you’ll spend less time pushing glasses up and more time enjoying whatever you’re doing.
Now that you’ve added silicone strips or ear‑hooks, the next piece of the puzzle is making sure the frame itself is shaped to stay put. A well‑fitted frame acts like a gentle hug – it doesn’t squeeze, it just rests where it should. If the geometry is off, even the best anti‑slip tricks will quit after a few minutes.
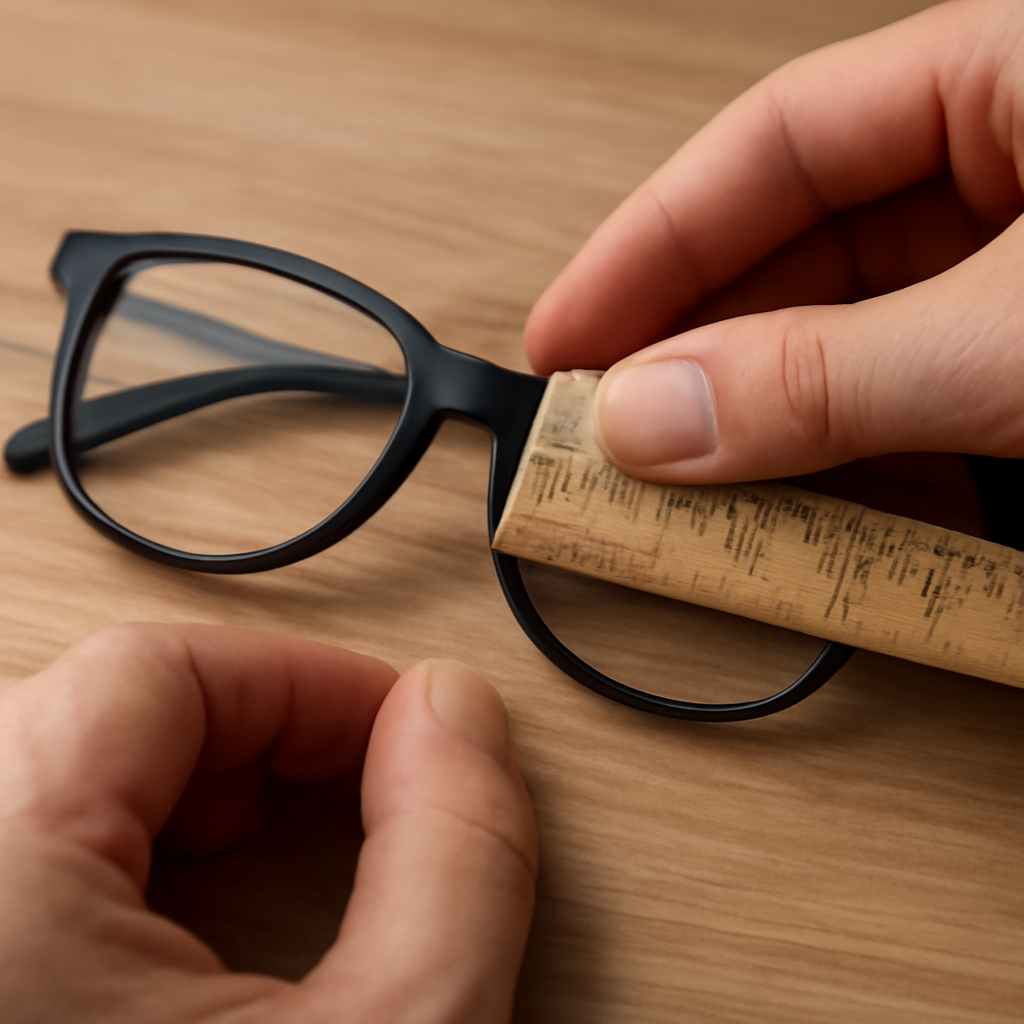
First, take a quick look at the bridge curve and temple length. A bridge that’s too flat will let the glasses slide forward, while overly long temples push the frames down as they swing with every nod. Adjusting these dimensions is usually a matter of a tiny screw turn or a gentle bend, but the impact is huge.
Here’s a quick checklist you can run through while you’re in front of the mirror:
Place the glasses on a flat surface. If the bridge sits flat, you’ll likely feel a slide‑down sensation when you wear them. Gently warm the bridge with your fingertips and nudge it into a slight upward curve. Think of it as giving the glasses a tiny “nose‑bridge smile.”
Put the glasses on and look straight ahead. The temples should angle back just enough to hug the side of your head without digging into the skin. If they point too far down, the weight of the lenses will pull the frames forward. A small bend upward at the end of each arm can solve this.
Measure the distance from the hinge to the tip of the temple. Most adult frames sit comfortably between 135‑140 mm. If yours is longer, you’ll notice the frames slipping after a few minutes of talking or reading. Most opticians can trim a millimetre or two – it’s a painless fix.
Need a visual reference? Our detailed guide on nose‑pad tweaks walks you through the same principles, just from the pad side of things: How to Adjust Nose Pads on Glasses: A Simple Step‑by‑Step Guide. The two approaches complement each other like peanut butter and jelly.
Below is a side‑by‑side comparison of the three most common frame‑fit adjustments, what they solve, and a quick note on how to do them.
| Adjustment | What It Fixes | How to Do It |
|---|---|---|
| Bridge curvature tweak | Prevents forward sliding on flat bridges | Warm bridge with fingertips, gently bend upward a few degrees |
| Temple arm angle bend | Stops the frame from pulling down the nose | Use a small pliers or your fingers to angle the arm back 2‑3° |
| Temple length trim | Reduces excessive downward pressure | Ask your optician to shave off 1‑2 mm from the tip |
Real‑world example: Maria, a graphic designer who spends hours at a drafting table, found her frames slipping every time she leaned forward. After adjusting the bridge curvature by just a half‑degree and tightening the temple angle, the slides stopped. She now works uninterrupted, and the silicone strip she added stays exactly where she wants it.
Another case: Jake, an avid cyclist, noticed that on long rides his glasses kept sliding off his nose. He trimmed the temple tips by 1 mm and added a subtle upward bend. Combined with the ear‑hook he already had, his glasses stayed put through a 50‑mile ride without a single adjustment.
If you’ve tried these tweaks and still feel the slip, it might be time to get a professional opinion. Sometimes the nose pad shape or the frame’s underlying design just isn’t right for your facial structure. A quick consult with an eye specialist can reveal hidden fit issues. For instance, Dr Rahul Dubey offers personalized fitting advice that can save you from endless DIY attempts.
Bottom line: a proper frame fit is the foundation. Once the bridge and temples are in harmony with your face, the anti‑slip accessories become the finishing touch, not the crutch.
Ever notice how a little film of sweat or oil can turn a perfectly fitted pair of glasses into a slip‑away nightmare? The truth is, even the best nose‑pad tweaks will fail if the bridge is constantly wet or greasy. Keeping your frames clean and moisture‑controlled is the silent hero behind a slip‑free experience.
When you wipe away oil, you’re restoring friction – the same principle that lets you grip a coffee mug without it slipping. Moisture acts like a lubricant, letting gravity do its job and pull the glasses down. A quick clean restores that grip, and you’ll feel the difference the moment you put the glasses back on.
1. Grab a soft, lint‑free cloth (the ones that come with most cleaning kits work great).
2. Dampen it with a splash of mild, soap‑free cleanser – think baby shampoo diluted 1:10.
3. Gently rub the bridge, nose pads, and temple arms in a circular motion. Avoid harsh scrubbing; you don’t want to scratch any coating.
4. Follow with a dry portion of the cloth to remove excess moisture.
Do this once a day, especially after workouts or a long coffee break. It only takes a minute, and the frames will feel “grippier” the next time you wear them.
If you’re the type who jogs, works in a kitchen, or lives in a humid climate, you’ll need a proactive approach. After a sweaty session, pause for a quick wipe‑down before you head back to your desk. A tiny dab of isopropyl alcohol on the cloth can evaporate lingering moisture faster, but use it sparingly – you don’t want to dry out silicone pads.
For everyday humidity, consider a micro‑fiber cloth in your bag. It’s less abrasive than paper towels and can absorb light condensation before it becomes a slip trigger. Some people even keep a small spray bottle of distilled water handy; a light mist followed by an immediate dry wipe can neutralize salty sweat residues.
Eyeland points out that many of the same products that prevent fog also add a thin protective layer that reduces slipperiness caused by sweat (see professional tips). A dab of diluted dish soap, left to air‑dry, creates a film that repels moisture while still feeling smooth to the touch. Just remember to re‑apply after a thorough cleaning, because the film wears off over time.
Another low‑tech option is a tiny strip of medical tape on the inner bridge. It soaks up sweat and gives the skin a bit of texture, which translates into extra grip. The tape is virtually invisible and can be replaced weekly.
Think of your glasses routine as a three‑step loop: clean, dry, protect. After you’ve adjusted nose pads (Step 1), added anti‑slip accessories (Step 2‑4), finish with a quick wipe‑down and a moisture‑blocking layer. When you walk into a meeting or hop on a bike, you’ll notice the frames staying put without you having to think about it.
So, what should you do next? Keep a cleaning cloth in your pocket, make a habit of wiping after any activity that makes you sweat, and give the anti‑fog film a try if you live in a humid area. In just a few seconds each day, you’ll eliminate the most common cause of slipping and enjoy a more confident, uninterrupted view.
So you’ve tried the pads, the wax, the silicone strips… and they’re still sliding like a sled on ice? It’s frustrating, I get it. Let’s dig into a few less‑obvious accessories and the kind of pro tweaks that can finally put an end to the slip‑down dance.
If your frames didn’t come with replaceable pads, grab a tiny silicone stick from any drugstore. Peel off the backing and press it onto the inner bridge where the glasses meet your skin. The stick adds a barely‑there layer of friction without changing the look of the frames.
Because silicone is soft, it won’t bite, but it does create a micro‑suction zone that holds the bridge in place. You’ll notice the difference the first time you lean forward – the glasses stay put.
Sometimes the pads are fine, but the way they sit on the bridge is off by a millimetre. An optician can reshape or reposition them with precision tools that we don’t have at home. A quick 5‑minute visit can save you hours of fiddling.
Ask them to test the fit by having you read a line of text from a few inches away. If the frames stay level, you’re good to go.
Remember the diluted dish‑soap trick we mentioned earlier? A thin anti‑fog film does the same job but lasts longer. It creates a smooth, water‑repellent coating that keeps sweat from turning the bridge into a slip‑slide.
Just apply a pea‑size dab, spread it thin, let it dry, and you’ve got a dual‑purpose shield – clearer vision and a firmer grip.
For the active crowd – joggers, chefs, kids who love to move – a thin elastic strap that wraps around the temples does wonders. It adds a little extra height at the arm’s end, preventing the glasses from sliding off low ears.
These bands are practically invisible under hair and come in a rainbow of colours if you’re feeling playful.
Silicone ear hooks attach to the temple arms and curve gently behind the ear, pulling the frames forward just enough to counter gravity. They’re waterproof, durable, and almost unnoticeable once you get used to them. Learn more about how ear hooks can help you.
Installation is a breeze: loosen the tiny screw on the arm tip, snap the hook on, and tighten just enough so it hugs without pinching.
Metal frames can be surprisingly heavy. If you’ve tried lighter accessories and the slip persists, ask your optician to bend the temples inward by a few degrees. This tiny angle change redirects the weight back toward the ears instead of pulling the bridge down.
They can also shave a millimetre off the temple tips, which reduces the lever effect that drags the glasses forward.
All the hacks in the world won’t help if the frame’s design is fundamentally unsuitable for your face shape. A narrow nose, low‑set ears, or a particularly heavy lens prescription might call for a lighter, better‑curved frame.
Look for acetate or ultra‑light titanium models that naturally hug the bridge. Many of our customers find that swapping to a slimmer silhouette eliminates the need for any add‑ons.
Bottom line: you’ve got a toolbox now – silicone sticks, anti‑fog film, straps, ear hooks, and pro‑level tweaks. Pick one or combine a few, test the fit, and you’ll finally answer the question “how to stop glasses from slipping down nose” for good.
We’ve walked through everything from tiny screw tweaks to silicone strips, and now you know exactly how to stop glasses from slipping down nose without a trip to the optician.
Think about the last time you nudged your frames mid‑sentence – that frustration is over once you pick the right combination of pad adjustment, grip aid, and frame fit.
Start simple: clean the bridge, fine‑tune the nose pads, and add a whisper of wax or a thin silicone pad. If the slide persists, try a discreet ear‑hook or ask an optician to bend the temples just a couple of degrees.
Remember, the goal isn’t to turn your glasses into a DIY project masterpiece; it’s to make them feel like a natural extension of your face. A quick five‑minute routine each morning can keep you focused on reading, working, or enjoying coffee instead of constantly pushing your glasses up.
So, what’s next? Grab your screwdriver, give those pads a millimetre tweak, and test the fit. If you need a little extra grip, keep a tiny roll of silicone strips in your bag – they’re cheap, invisible, and surprisingly effective.
In the end, a well‑fitted pair stays put, freeing you to see clearly and move confidently. Happy adjusting!
Most of the time the slide is caused by a combination of low friction and weight distribution. When the nose pads sit too low or the bridge is oily, the frames lose the little grip they need to stay put. Sweat, humid air, or an ill‑shaped bridge can also turn a perfectly fitted pair into a constant nudging exercise. The good news is that a few tiny tweaks usually solve the problem.
First, clean the bridge with a lint‑free cloth so you can see the pads clearly. Using a tiny flat‑head screwdriver, turn each pad a millimetre toward the centre if the glasses sit too low, or pull them apart slightly if they ride up. Test the fit by putting the glasses on and speaking for a minute; you’ll feel a gentle, even pressure without pinching. If the slide persists, repeat the micro‑adjustment until the pads hug your nose just enough.
Anti‑slip wax works best on metal and acetate frames because the surface is smooth enough to hold a thin layer of tack. Plastic frames with textured finishes can trap wax particles, which may look speckled over time. Apply only a pea‑size dab to the inner bridge, let it set for a minute, then wipe away any excess before you sleep. If you notice residue building up, simply clean the bridge with a mild soap solution and the wax will stay effective.
Choose a thin, medical‑grade silicone strip that has a low‑profile adhesive backing. Cut it to the exact width of your bridge, usually about 10 mm, and peel off the liner in a clean, dry environment. Press the strip firmly for ten seconds, then trim any overhang with tiny scissors so it sits flush. Because the adhesive is designed for skin, it won’t leach chemicals onto the lenses, but you should still avoid rubbing the strip with harsh cleaners.
Ear hooks are most effective on frames with straight temple arms that have a tiny screw at the tip. If your glasses have flexible plastic temples, you can still use a silicone hook that slides onto the arm without any screws, but the grip won’t be as secure. When you install a metal hook, loosen the screw just enough to slip the hook on, then retighten until you feel a gentle pull behind the ear – never so tight that it cuts into the skin.
A quick wipe‑down once a day is enough for most people, especially after you’ve sweated or eaten a greasy meal. Use a soft microfiber cloth lightly dampened with diluted baby‑shampoo; it removes oil without stripping any coating. If you live in a humid climate, give your glasses a second wipe in the evening before bed. Consistent cleaning restores friction on the bridge and nose pads, which is the simplest way to keep the slide at bay.
If you’ve tried adjusting pads, adding wax, silicone strips, and ear hooks and the glasses still drift down, it’s time for a professional. An optician can reshape the bridge, replace worn pads with custom silicone inserts, or recommend a frame style that matches your facial geometry. Also, if you notice persistent pressure marks on your nose or skin irritation, a trained eye can prevent long‑term discomfort. In short, when the DIY cycle feels endless, book a quick adjustment.